Showing posts with label Cutesy Crafts. Show all posts

Monday, July 21, 2014

GIVEAWAY and other fancy stuff!

Happy Monday to you all! It's time to link up with 4th Grade Frolics for another Monday Made-It! I am excited to share a few things with you that I have been working on this week:)
I have joined all of the hype and made a teacher tool box! This was so much fun to make and I am so excited to fill it with everything and place it in my classroom! 

*I got the toolbox from Lowe's for around $16.
*I printed off the labels from Common Core and So Much More
*I spray painted my toolbox black with regular spray paint I had on hand.
*I used washi tape on the front to add more color!
Now I have a reason to tell my husband that it is mandatory to buy things to fill this baby up;)
For My second made-it, I'm going to show you my super good deal this week:) I MADE IT to Office Depot/Office Max for a great deal on Post -Its. The sale started yesterday and goes until the 26th of July.

This year I am adding pops of color wherever I can, including anchor charts! I got these post-its on sale for $1.00  for a pack of 3! I cannot get enough of these! I know a lot of you out there are girls after my own heart being obsessed with sticky notes. They are my absolute FAV.  I have been checking the Office Depot sales every Sunday. I'm sure most of you saw their AMAZING deal last week with the.25 Sharpie markers! Make sure you ask them about doubling the limit for their sales since you are a teacher! 
This week I MADE a mini milestone! I made it to 300 followers on my Instagram! That may not be very large, but exciting, nonetheless! Because of this mini-milestone, I am doing my first GIVEAWAY!

I recently created a sight word sticker book and placed it into my Teachers Pay Teachers store. This sight word sticker book includes the 220 Dolch sight words and is perfect for those first learning to read  and to motivate students to take charge of their own learning! Here is how to win!

a Rafflecopter giveaway


Click to get back to the linky party and see what others have been up to this week!

Fourth Grade Frolics

Monday, July 14, 2014

Monday Made-it: TpT Products and Banners

Happy Monday, y'all! This week has been a fun, yet productive one! I have seen so many good ideas and reading lots of blog posts:) I'm linking up with Tara from 4th Grade Frolics this week for Monday Made it! I am so excited to share with you what I have been up to this week! Let's dive on in, shall we?!
I created my very first Teachers Pay Teachers Product this week and I am very excited about it! This is a freebie in my TpT store:) I decided that I wanted to brighten up my classroom this year and in doing so, I wanted a fun, cute, and bright word wall. Well have I got the thing for you! I have created word wall headers that are framed in bright colors for you to print out and use on your word wall. I did all 26 letters of the alphabet (obviously) and in each header is a capital and lowercase letter. You can print them out, laminate them, and keep them as they are, or you can do what I am going to do and place them on the tops of black construction paper to laminate so the colors really pop! The colors include pink, orange, purple, green, light blue, and yellow. These colors follow a pattern throughout the whole alphabet. Here is a preview of what the headers look like!

If you are interested in this Freebie, head on over to my TpT store by clicking here! Don't forget to leave some love and feedback. I love to read what people write:)  You can also show my little store some newly opened love by following me on Tpt. 

I have been finally getting more followers on Bloglovin'Instagram, and Facebook and I am so thankful for my followers already. All of you look so wonderful and I cannot wait to connect and make friendships with you!

I pulled a late-nighter last night and finished up my second product on TpT! I had so much fun making the first one, I think I may be addicted:) I am also excited to share this one with you! Last year, I had so much trouble keeping track of which sight words my students had mastered. I have two sets of classes as a reading teacher which is close to 50 kids! I kept an updated sight word checklist as well as attempted to do a filing system for mastered sight words, however, the keep up on this task was very difficult. Browsing around, I began to see sight word books that each student could have and they placed a sticker on each word they could say without hesitating too long. I am a strong believer in pushing sight words because if a student can read them fluently, this will help them with their reading fluency, comprehension, and everything else will follow! I saw versions that were great, but I wanted to focus primarily on Dolch sight words. I began to create a sight word sticker book for this year's bundles of joy! 

There are 8 pages of sight words for a total of all 220 Dolch sight words for your students to master! I am so happy about these because they are mobile, which means I can send them home for extra practice. I don't know about you, but my first graders will do pretty much anything for a sticker. This method has been classroom tested and it works wonders! Students are not driven to learn and take charge of their learning. This has really allowed my students to increase their reading fluency and all around has helped them become better readers and writers. I am so much more organized as each student has one and keeps it in their book bag! This is now available at my TpT store:) Here is the link again.


I also was able to make a name banner for my classroom this week! As you can see, my name looks very difficult for anyone to pronounce, let alone first graders! They are always asking how to spell my name and it is required we have our names posted above our white boards. I thought this would be a way to add a fun pop of color in a cute way! I have yet to put it together with the cute purple ribbon because I want to laminate it first:)
All I did was picked up some cute patterned paper from Michaels, cut, and free handed my name on with marker. Super simple way to add a splash of color in your room! I'm excited to see it hanging up!
More pictures to come when my classroom is all set up!

Stay tuned next week for my next Made-it projects!
P.s= for those of you wondering, my last name is pronounced (CUH-TOO-ZIS) It's greek and I blame my husband!

Check out the other Monday Made It Projects over at 4th Grade Frolics Page and have a great week:)

Fourth Grade Frolics

Monday, July 7, 2014

Monday Made It: Washi Tape Clothespins

I am linking up with Tara from 4th Grade Frolics for Monday Made it again this week!


This week I am going very simple with these wash tape clothespins. I saw this idea on Pinterest of course and I had to make my own! This is such a simple way to spruce up the classroom and is easy peasy! Clothespins are so boring and blah!

 I decided that this year I was going to hang up student work samples with clothespins so that I didn't have so many staples in the wall to remove. This past year, I removed so many staples from the wall that I created a scar on my finger from it brushing up against the wall of many times. NOT AGAIN.

I already had the wash tape on hand from making my end-of-the-year teacher gifts for my first grade team so this project essentially cost nothing.


The final step for these wash tape clothespins is to hot glue a flat push pin to the back of it so they stick in the wall easily and are easy to remove or change locations.


Stay tuned next week for my next project!


Click here to get back to the linky party!

Fourth Grade Frolics

XOXO

Wednesday, July 2, 2014

LOVE. IT.


I cannot tell you how excited I am about this post! I have been pressing my lips together so not a peep could squeeze through…okay. I lied. I showed 4 people. But that doesn't mean I don't love you all;) As I mentioned before, I am doing away with a theme this year. Last year I used a jungle/safari theme--this year I am going to try something different.

Since I primarily just teach reading and I share approximately 40-47 students between my partner and I, I get to decorate my room mostly with reading decor. I teach reading, language arts, and I also teach social studies to my home room class. I plan to incorporate this either behind my reading table or around one of my bulletin boards.

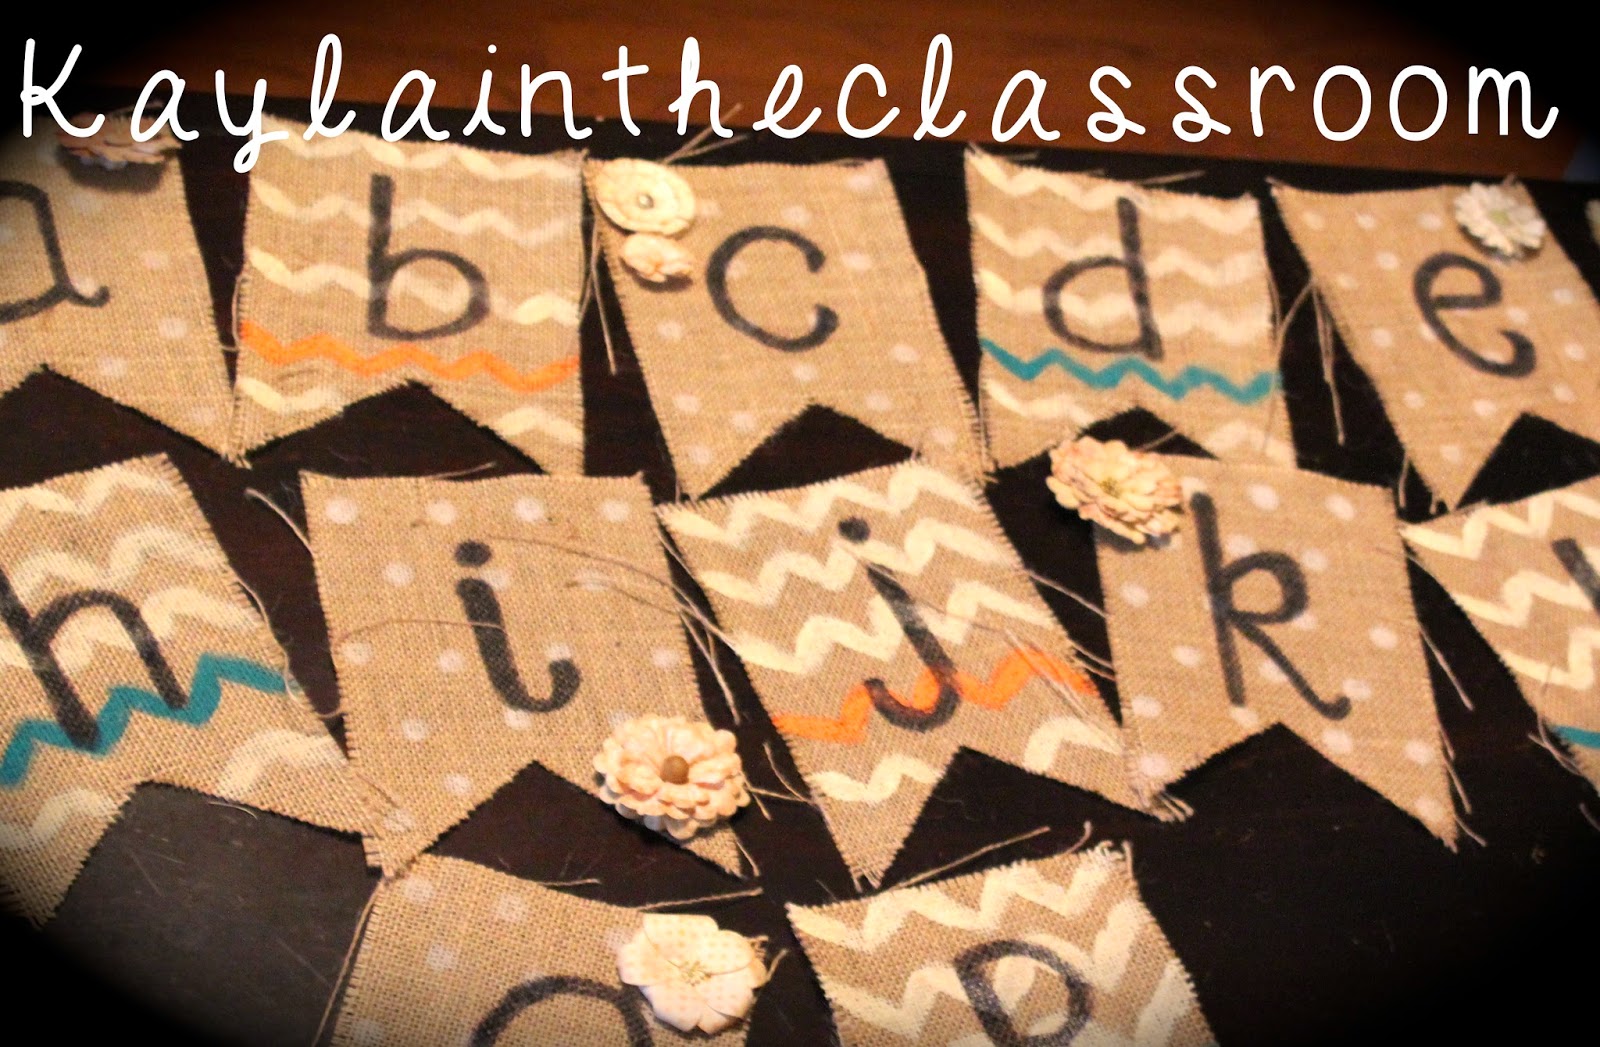
I am so sorry about not having a final picture of it in my classroom--the ever-so-nice  janitors are deep cleaning my room. Aren't janitors the greatest?! I think so too :) Introducing to you, my newest product creation…..A burlap pennant alphabet banner! SO. CUTE. I cannot wait to get into my classroom and hang it up!

p.s.--As you can imagine, 26 letters is a lot to fit into a picture so forgive me that not all of them are pictured..but you get the idea!

I have also created an Etsy Shop which I will sell these made-to-order.

Let me know what you think! Here is how it turned out :)


XOXO


Tuesday, July 1, 2014

DIY Classroom Decor--Inspirational Poster Board

Over my many year of Pinterest I have seen the cutest things. My goodness Pinterest is great, is it not?!?! One of the many things that I had pinned long before I even had my classroom was an inspirational poster that encourages students and lets them know that they are loved and cared for. I love the message it conveys and I decided it was time to make my own! I pulled up the image on the computer as you can see below and went to town on my own :) I have no idea who "coined" this originally but props to them for such an inspiring message.

Since I am adding bright colors to my classroom this year, I decided on a pretty purple poster board that you can get at your local Michaels, Hobby Lobby, or crafting store. I already had a paint marker from a craft I was previously working on. I chose to use a white paint crayon to offset the bright purple. I looked back and forth at the computer and then my poster board. Back and Forth. Back and Forth. 

I also decided to pick up some cute scrapbook flowers to add just a touch more flair to my poster. I also chose to add flowers because when you buy a poster board, you know how there is a barcode sticker stuck right onto the poster board? Yea, well it left an off-colored, ugly blob right in plain sight so naturally, I had to cover it up! This craft project was so much fun because I love drawing new fonts and letters. This is what my final project looked like and I couldn't be happier with how it turned out. This was my first Made It Monday projects of many to come. 


You are going to LOVE what it coming next for Made It Monday! Stay tuned and for now, follow me on instagram for sneak peeks and previews! @mrscoutouzis

XOXO

Thursday, June 12, 2014

Clipboard Gifts on a Budget

Calling all DIY-ers on a budget! Do you want to give special personalized gifts without spending your whole paycheck? Yea, me too! Here's my idea that I will share with you. I recently made these adorable clipboards for each person on my first grade team for an end-of-the-year gift!
Step 1: I went to my local craft store (I prefer Hobby Lobby) and picked out scrapbook paper that I thought described each person on the first grade team (a couple sheets per person). I bought sponge brushes, modge podge, decorative tapecraft paint, and clipboards.
Side note** I used matte modge podge because I did not want the clipboard to have a shiny gloss.
Step 2: Determine which paper you want for each clipboard,organize them with each clipboard, and brainstorm patterns in which you will cut and lay down.
Step 3: I painted the top section of each clipboard (front and back) in a color that would match the paper. One reason for this is so you do not have to cut your paper to fit around the clip part of the board.
Step 4: Once the paint dries, I put a piece of tape (you can also use ribbon) at the end of the paint line to make for a more clean line between paint and paper.
Step 5: Cut the paper in strips or in chunks in which you want to stick on the clipboard.
Step 6: Get a sponge brush and dip in the jar of mode podge and apply to the back of the scrapbook paper. Layer your paper as you wish.
Step 7: If you wish to do a monogram of the person's first or last name, you may use a stencil or freehand the letter. I chose to freehand to get my desired style.
Step 8: Once all paper is stuck on with modge podge, I apply a final coat and generously cover all of my clipboard (front and back) with it to hold everything in place.
Here are some pictures to show you how my clipboards turned out. These are my "guinea pig" clipboards so they are by no means perfect, however, my friends still loved them :) Although the pictures only include the backs of the clipboards, I did do the front of them as well so the un-applealing brown side was not showing at all. My apologies for not having pictures for step-by-step instructions. I did not think of this until I was finished because I was having so much fun! Hope you enjoy!
P.S-Some pictures show streaks on the clipboard. I promise it does not dry like this, I was just eager to take the picture and share with all of you!
XOXO Kayla

photo-6photophoto-2photo-3photo-4photo-5